| TUTORIAL Job Summary - excerpt from a user manual The following is an excerpt from the HyperMatter user manual produced for 2ndNature Industries by Forcade Associates. This project consisted of working closely with the development team to create the manual's tutorials and illustrations as well as the program lexicon and features. The 245 page two color manual was written, designed, and illustrated by Forcade Associates. This excerpt covers a portion of one of several tutorials created for this character animation plug-in for 3D Studio MAX. TUTORIAL
2 - Daredevil Mouse
Although the following scene file contains a somewhat complex HyperMatter animation, the tutorial has been streamlined to take you quickly through the process used to create character animation with HyperMatter. You will see how HyperMatter Solids can be applied to an entire character or just to selected parts of a character. You will also see how HyperMatter Constraints can be used to control both object motion and shape. In this tutorial you will: • Examine an advanced HyperMatter character animation • Compare the differences between Object and Sub-Object Solids • See how Constraints affect Object motion and deformation • Enable and Disable selected HyperMatter Solids to enhance performance. View
the Animation H_CannonMouse is a Object Level Solid which contains all of the character’s geometry and thus is entirely under HyperMatter control. As you will see, the character’s trajectory, as well as its deformation is guided by a combination of HyperMatter substance properties along with several Constraints. In the following steps you will load the scene and an AVI file of the animation. 1.
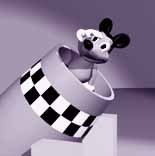
Start 3DStudio MAX and open CH2_dd01.max. 2. Choose File/View File, and select Daredevl.avi from the browser. The animation opens with a mouse character facing the camera and saluting from inside the cannon. 3.
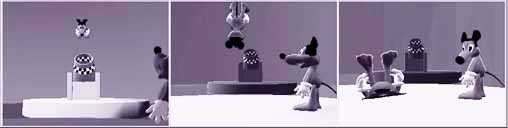
Play the preview. The SaluteMouse descends into the cannon as the
camera orbits and dollies back. The cannon then fires and recoils as
H_CannonMouse exits the cannon and flies through the air toward the
CrashPlatform. On impact H_CannonMouse collapses like an accordion and
rolls about from inertia.
4. Select Scale/Frames from the Media Player Menu Bar and click drag along the Media Player timeline to closely examine the animation. As H_CannonMouse flies through the air, H_SpectatorMouse follows its motion path finally reacting to the impact at frame 216. H_SpectatorMouse is jolted from the impact of H_CannonMouse, and as its head rotates toward camera its ears , snout, and left hand react to the changes in its head and body positions.
|